This is the third in a series of ‘how-to’ articles on creating an interactive Alexa Skill. The skill is called ‘Fizz Buzz Bongo’ and is available in the Alexa Skills Store. It’s a variation on the classic ‘Fizz Buzz’ programmer test, but converted into a game. The first articles detail explain the Java code and how to build it, the second covers how to deploy it to AWS using Terraform and this article explores how to register the Alexa Skill in the Amazon Developer Console.
Full source code is available at https://github.com/adrianmilne/alexa-fizzbuzzbongo-skill. Click the links below to see parts 1 and 3:
- Developing an Alexa Skill: Part 1, Create Java Lambda
- Developing an Alexa Skill: Part 2, Deploying to AWS Using Terraform
- Developing an Alexa Skill: Part 3, Publishing the Skill
The Fizz Buzz Bongo Game
I wanted to develop a simple, yet feature rich, skill to base a series of article on (I find it helps organise my own understanding by writing articles on topics), and also exercise the interactive element of having a conversation with Alexa. I came up with a variation on the simple ‘Fizz Buzz’ programming skill test.
Fizz Buzz is a classic interview test given to programmers. They usually are tasked with writing a program that will print out the numbers from 1 to 100, substituting ‘fizz’ for multiples of 3 and ‘buzz’ for multiples of 5. The Fizz Buzz Bongo game turns this into a game – where you take turns with Alexa counting up the numbers. To add a unique element, I’ve also included substituting multiples of 8 for ‘bongo’ (and ‘fizzbongo’ for multiples of 3 and 8, ‘buzzbongo’ for 5 and 8 and ‘fizzbuzzbongo’ if you make it a multiple of 3, 5, and 8). Example Alexa phrases to get started are:
Alexa, load Fizz Buzz Bongo
Alexa, ask Fizz Buzz Bongo to start a new game
Alexa, ask Fizz Buzz Bongo to start a new game at 33
There are other ‘Fizz Buzz’ skills out there – but only one ‘Fizz Buzz Bongo’ (so far, at least…)
Creating the Skill in the Amazon Developer Console
Log into the Amazon Developer Console (you will need to register if you haven’t done so already). In the console click on ‘Alexa’ and ‘Alexa Skills Kit’ to get to the Alexa developer console.
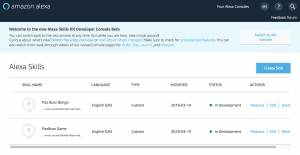
That will open up a screen similar to the screenshot below. The developer console is in a state of flux at present. The old console is being replaced by a new one, which is still officially a ‘beta’ release – which is the default one that loads. You can see from the screenshot below there is a button option to ‘Switch to old console‘. For the purposes of this demo – I’ll use the beta version for the screenshots, as the old version will no doubt be removed completely shortly. Please bear in mind – given this is currently at beta stage, these screens may change slightly in future.
This screen shows a list of all your skills. If you are starting from scratch – this will be empty. Click ‘Create Skill‘ to start creating a new skill – the next steps are covered below.
Create The Skill
On the first page you need to give your skill a name – this is just an internal name for your reference.
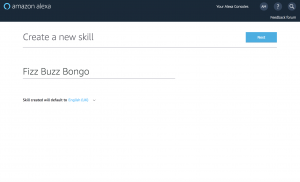 I’ve selected ‘English UK’ from the drop down box (because, well, I’m English).
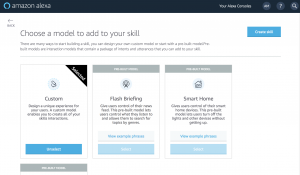
Enter a name and click ‘Next‘. On the next page you must select whether to use a Pre-Built Model, or a Custom one.
We are building a Custom Model. Select that option and click ‘Create Skill‘.
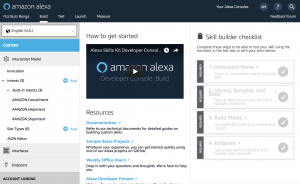
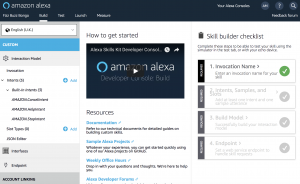
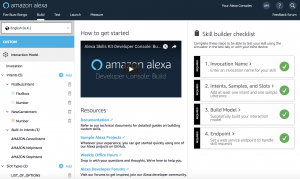
Clicking on the ‘Build‘ option on the main menu will load your Build progress main page, as can be seen below. You can see we have the shell of a skill – but there are number of tasks that need to be completed before the skill is ready. They are shown greyed out on the right hand side of the page. As we complete these they will turn into green ticks.
Build the Model
Step 1: Invocation Name
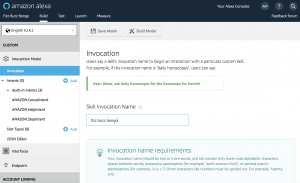
Click ‘Invocation Name’. Give it a name – this is the name people will use to launch your skill. There are a number of caveats to the name you can choose:
Your invocation name should be two or more words, and can contain only lower-case alphabetic characters, spaces between words, possessive apostrophes (for example, "sam's science trivia"), or periods used in abbreviations (for example, "a. b. c."). Other characters like numbers must be spelled out. For example, "twenty one". Invocation names cannot contain any of the Alexa skill launch phrases such as "launch", "ask", "tell", "load", "begin", and "enable". Wake words including "Alexa", "Amazon", "Echo", "Computer", or the words "skill" or "app" are not allowed. Learn more about invocation names for custom skills.
I’ve called it ‘Fizz Buzz Bongo’. Obviously, if you are deploying your own skill – you’ll need to come up with a different name. You can change the name later (until you publish it , at which point it cannot be changed).
When you have entered the name, click ‘Save Model‘ to save it. Then select ‘Build‘ again from top menu to return to the main build screen (you can’t actually build the model itself at this stage). You will now see the Invocation Name has a green tick.
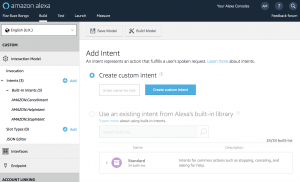
Step 2: Intents, Samples and Slots
Click on the next step – ‘Intents, Samples and Slots’
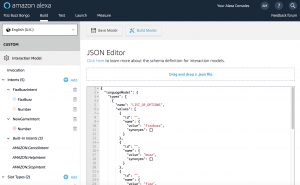
You can build this using the UI. However, this is JSON – there’s an example in the source code in the GitHub repo – called interaction-model.json. Click ‘JSON Editor’ in left hand pane – copy the JSON content from repo and paste over. Click ‘Save Model’
Click ‘Build‘ to return to main build screen.
Step 3: Build Model
Next step is to ‘Build‘ – click that option from the right hand side (or you could have clicked after saving the model on the JSON screen above. Building normally takes a couple of minutes to complete.
Step 4: Endpoint
This is where we have a bit of a circular dependency. We will deploy a Lambda function on AWS to act as the back end for our skill. We need to provide the ARN of this lambda in this step so Alexa can route requests to it. This is clear and makes sense.
However, the Lambda also needs to be configured to accept requests from our particular skill – so we need to add the Application ID of our skill to the lambda.
It doesn’t matter which of these we do first – but they both need to be set before the skill will work.
For the purposes of this demo, as we haven’t discussed the lambda yet, we will jump over to the lambda and set the Skill ID there before setting the lambda endpoint here.
Setting the Alexa Skill ID in the Lambda
The fizzbuzzbongo lambda source code is available in GitHub. If you haven’t done so already – you need to check that out – you can find full instructions in the first post in this series – “Developing an Alexa Skill: Part 1, Create Java Lambda”.
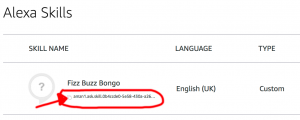
Firstly – you need to fid the application/skill ID of the new skill we have just created above. If you return to the main page of the Alexa Console that lists your skills – you will see the Skill ID just underneath the skill name. It’s not obvious – but there is a small ‘copy’ icon just to the left of it. If you click that – it will copy the skill ID to the clipboard.
Zoomed in, with copy icon and skill id highlighted.
You then need to edit the GameSpeechletRequestStreamHandler.java class from the Github repo code – and input the skill ID of the new Alexa skill we have just created. Then follow the rest of the instructions in Article 1 and Article 2 to build and deploy it.
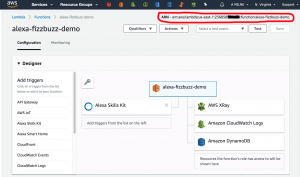
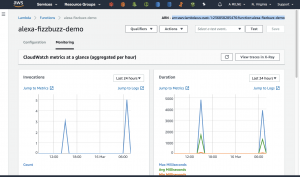
Once the lambda has been updated and deployed – we just need to copy the ARN. This is available in the AWS console on the lambda screen (example below – you can see the ARN in the top right).
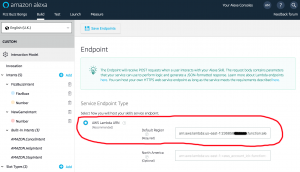
Once you have the Lambda ARN – click on the Endpoint setting back in the Amazon Developer Console.
Enter the lambda ARN you copied from the step above (from the AWS console) and click the ‘Save Endpoints‘ button.
Click ‘Build from the top menu – you can see now everything is Green.
Testing the Skill
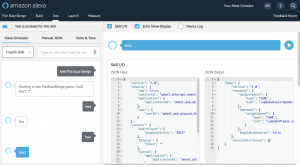
The next step is to test the skill to check it all works. Click on ‘Test‘ on menu. You can see that testing is initially disabled.
Click to enable. You can then test the skill. You can test it using an actual Echo if you have one logged into your account (it will find the skill in your account, even though it isn’t live yet). Another option is to use the testing tool built into the console. You can type or speak commands into it (by holding down the ‘mic’ button next to the input box) as if it were an Echo.
Debugging
If the test console experiences any errors – you can troubleshoot the back end lambda in the AWS console. If you find your lambda in the AWS console – you will see a link to ‘Monitoring’. This screen (shown below) will quickly let you see if your lambda is being invoked, and if there are any errors.
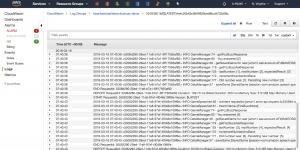
There are also handy links that will take you straight to the CloudWatch logs to investigate further. Clicking the ‘Jump to Logs’ link will take you directly to the logs for the lambda. The code in Github has a lot of logging statements to assist with troubleshooting issues.
Launching Your Skill
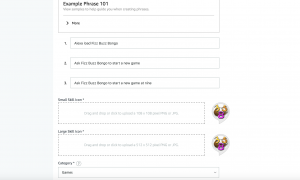
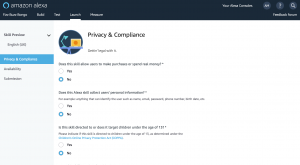
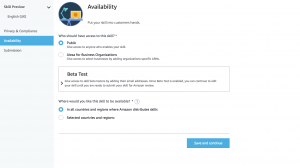
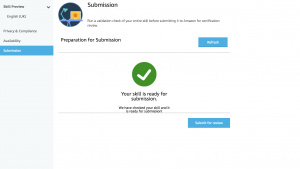
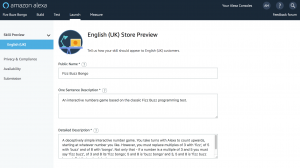
Back in the Amazon Developer Console, after you have tested your skill – click the ‘Launch’ option on the top menu bar to progress to the next step. This is to supply all the details (and icons) for Amazon to list your skill in the Skill store.
The screen shots below give an example of the type of info that needs to be entered.
You will see the skill is now listed as ‘In Certification’. It’s now a waiting game for Amazon to test your skill.
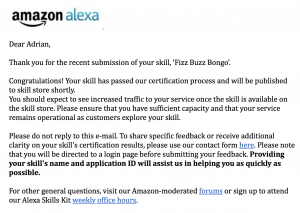
Receive Certification EMail
It only took a day for Amazon to approve my skill. You will receive an email confirmation when it has been approved.
Skill is Live
After it had been approved it was only a matter of hours before it was available in the Skill Store.
Conclusion
This article (and the 2 preceding ones) covered developing, deploying and publishing an Alexa skill. All source code is provided if you wanted to have a play around with it.
I’m going to let the skill run ‘in the wild’ for a little while, and then add some extra articles covering topics such as monitoring, performance tuning, deploying with CloudFormation and some specific code related updates.
Hope this was of some use. It’s no the greatest skill in the world – but if you have found this helpful – please leave a comment (and any 5 star reviews of the skill would be most welcome too ;-).


